网站备案 游戏提供搜索引擎优化公司
1.用pm2部署nest
说明:如果一开始将nest直接打包放到linux服务器上用pm2执行则会报错,这是因为tsconfig.build.tsbuildinfo文件的路径以及相关依赖问题。
报错会为:什么东西找不到....
所以建议以下为步骤一步一步配置
- 将整个nest添加压缩包直接传到的root中的任何一个目录中,在linux中解压
- 进入nest的项目文件用npm run build进行打包
- 此时需要下载好pm2进程管理器
- 直接pm2 start main.js运行后端项目
- 此时为了验证后端项目是否正常启动成功 可以在win上的浏览器缩编输入一个后端的get接口来验证
2.安装nginx
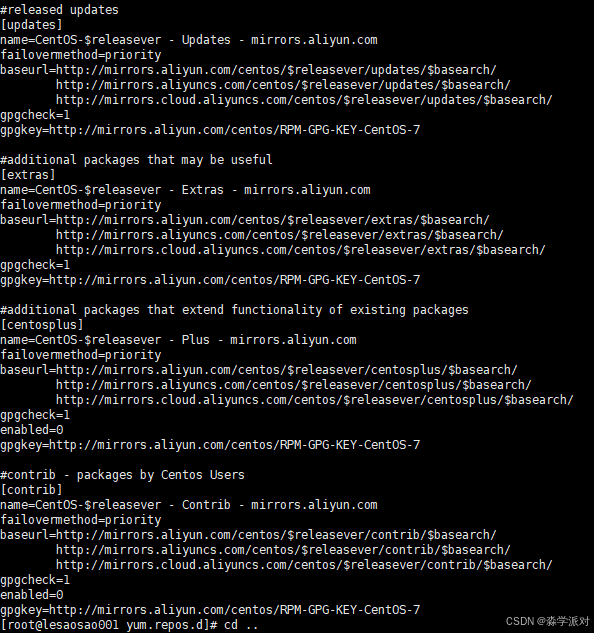
因为某些linux服务器为了兼容一些特定的项目使用的老的版本的linux系统,比如我此时用的就是centOS7,因为centOS7在2024年的6月份就把此linux版本的yum源镜像归档了,所以会导致我们在使用yum源来下载一些工具的时候会出现yum报错的现象。此时别慌,可以按照以下步骤操作!
报错信息如:
Loading mirror speeds from cached hostfile Could not retrieve mirrorlist http://mirrorlist.centos.org/?release=7&arch=x86_64&repo=os&infra=stock error was 14: curl#6 - "Could not resolve host: mirrorlist.centos.org; 未知的错误"

解决方法
- 进入/etc/yum.repos.d目录下找到 CentOS-Base.repo
- cd /etc/yum.repos.d

- cp CentOS-Base.repo CentOS-Base.repo.backup
- vi CentOS-Base.repo
- 进入修改内容为:
# CentOS-Base.repo
#
# The mirror system uses the connecting IP address of the client and the
# update status of each mirror to pick mirrors that are updated to and
# geographically close to the client.  You should use this for CentOS updates
# unless you are manually picking other mirrors.
#
# If the mirrorlist= does not work for you, as a fall back you can try the
# remarked out baseurl= line instead.
#
#[base]
name=CentOS-$releasever - Base
#mirrorlist=http://mirrorlist.centos.org/?release=$releasever&arch=$basearch&repo=os&infra=$infra
#baseurl=http://mirror.centos.org/centos/$releasever/os/$basearch/
#baseurl=http://vault.centos.org/7.9.2009/x86_64/os/
baseurl=http://vault.centos.org/7.9.2009/os/$basearch/
gpgcheck=1
gpgkey=file:///etc/pki/rpm-gpg/RPM-GPG-KEY-CentOS-7#released updates
[updates]
name=CentOS-$releasever - Updates
#mirrorlist=http://mirrorlist.centos.org/?release=$releasever&arch=$basearch&repo=updates&infra=$infra
#baseurl=http://mirror.centos.org/centos/$releasever/updates/$basearch/
#baseurl=http://vault.centos.org/7.9.2009/x86_64/os/
baseurl=http://vault.centos.org/7.9.2009/updates/$basearch/
gpgcheck=1
gpgkey=file:///etc/pki/rpm-gpg/RPM-GPG-KEY-CentOS-7#additional packages that may be useful
[extras]
name=CentOS-$releasever - Extras
#mirrorlist=http://mirrorlist.centos.org/?release=$releasever&arch=$basearch&repo=extras&infra=$infra
#$baseurl=http://mirror.centos.org/centos/$releasever/extras/$basearch/
#baseurl=http://vault.centos.org/7.9.2009/x86_64/os/
baseurl=http://vault.centos.org/7.9.2009/extras/$basearch/
gpgcheck=1
gpgkey=file:///etc/pki/rpm-gpg/RPM-GPG-KEY-CentOS-7#additional packages that extend functionality of existing packages
[centosplus]
name=CentOS-$releasever - Plus
#mirrorlist=http://mirrorlist.centos.org/?release=$releasever&arch=$basearch&repo=centosplus&infra=$infra
#baseurl=http://mirror.centos.org/centos/$releasever/centosplus/$basearch/
#baseurl=http://vault.centos.org/7.9.2009/x86_64/os/
baseurl=http://vault.centos.org/7.9.2009/centosplus/$basearch/
gpgcheck=1
enabled=0
gpgkey=file:///etc/pki/rpm-gpg/RPM-GPG-KEY-CentOS-7- 然后wq保存下,依次执行:
- sudo yum clean all
- sudo yum makecache
阿里云镜像源
以下两个命令都可以,执行完成后进入/etc/yum.repos.d
- curl -o /etc/yum.repos.d/CentOS-Base.repo https://mirrors.aliyun.com/repo/Centos-7.repo
- wget -O /etc/yum.repos.d/CentOS-Base.repo https://mirrors.aliyun.com/repo/Centos-7.repo
然后执行:
- cat CentOS-Base.repo
解析nginx
- yum install -y gcc-c++ pcre pcre-devel zlib zlib-devel openssl openssl-devel
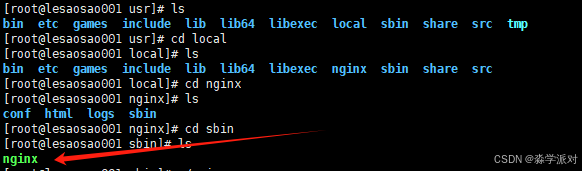
- 此时来到你安装nginx的目录
![]()
- ./configure --prefix=/usr/local/nginx --with-http_ssl_module
- make&&make install
此时去/usr/local/nginx目录中去找配置好的nginx(此时就可以看到nginx执行文件了)
配置nginx.conf文件
(两个,一个为一开始下载的nginx文件,另一个为解析到/usr/local/nginx之后的文件)
http {include   mime.types;default_type  application/octet-stream;server {listen 443 ssl;server_name 自己解析的域名;#你解析域名的密钥文件两个(假如你都放在了/etc/Assl目录下)ssl_certificate /etc/Assl/XXXXX.pem;ssl_certificate_key /etc/Assl/XXXXX.key;location / {#访问域名就可以看到的前端项目(假如你都放在了/etc/lesaosao_lunxun_ui目录下)root  /etc/lesaosao_lunxun_ui/dist_pc;index  index.html index.htm;try_files $uri $uri/ /index.html;}location /api/ {#访问后端项目的端口(ip+端口号)proxy_pass http://xxx.xx.xx.xx:3000/;proxy_set_header Host $host;proxy_set_header X-Real-IP $remote_addr;proxy_set_header X-Forwarded-For $proxy_add_x_forwarded_for;}location /images/uploadimg/ {#访问后端存放前端上传的图片目录alias /root/usr/lesaosao_lunxun/uploadimg/;}# SSL configurationsproxy_ssl_session_reuse off;proxy_ssl_protocols TLSv1.2 TLSv1.3;proxy_ssl_ciphers HIGH:!aNULL:!MD5;}server {#第二个前端项目(假如不需要使用域名访问)listen 8100;location / {#访问8100端口就可以看到的前端项目(假如你都放在了/etc/lesaosao_lunxun_ui目录下)root /etc/lesaosao_lunxun_ui/dist_web;index  index.html index.htm;try_files $uri $uri/ /index.html;}location /api/ {#访问后端项目的端口(ip+端口号)proxy_pass http://xxx.xx.xx.xx:3000/;proxy_set_header Host $host;proxy_set_header X-Real-IP $remote_addr;proxy_set_header X-Forwarded-For $proxy_add_x_forwarded_for;}#因为该前端不涉及上传图片等文件所以该目录可忽略location /images/uploadimg/ {alias /images/uploadimg/;}# SSL configurationsproxy_ssl_session_reuse off;proxy_ssl_protocols TLSv1.2 TLSv1.3;proxy_ssl_ciphers HIGH:!aNULL:!MD5;}
}
events {worker_connections  1024;}
重启nginx服务!
发现访问域名项目即可被访问到!(特殊linux需配置防火墙以及开放端口等操作)