同一个公司可以做几个网站吗网站备案流程
版权归作者所有,如有转发,请注明文章出处:https://cyrus-studio.github.io/blog/
使用 Chocolatey 安装 Hugo
Chocolatey 是一个 Windows 软件包管理器,使用 PowerShell 和 NuGet 作为基础。它可以自动化软件的安装、升级和卸载过程。
安装 Chocolatey(如果还没有安装)
Chocolatey 允许你通过设置环境变量来更改默认安装路径。在安装 Chocolatey 之前,你需要设置 ChocolateyInstall 环境变量来指定新的安装路径。
打开 PowerShell(以管理员身份运行),并执行以下命令指定自定义安装路径:
1. [System.Environment]::SetEnvironmentVariable('ChocolateyInstall', 'D:\App\chocolatey', [System.EnvironmentVariableTarget]::Machine)
- 如果不设置默认安装路径为:C:\ProgramData\chocolatey
设置完 ChocolateyInstall 环境变量后,重新打开一下会话,执行下面的命令检查一下是否设置成功
Get-Item Env:ChocolateyInstall
打开 PowerShell(以管理员身份运行),执行以下命令安装 Chocolatey:
1. Set-ExecutionPolicy Bypass -Scope Process -Force; [System.Net.ServicePointManager]::SecurityProtocol = [System.Net.ServicePointManager]::SecurityProtocol -bor 3072; iex ((New-Object System.Net.WebClient).DownloadString('https://community.chocolatey.org/install.ps1'))
检查是否安装成功
choco -h
安装 Hugo
在 PowerShell 中运行以下命令安装 Hugo:
安装软件包:
choco install hugo -confirm
升级软件包:
choco upgrade hugo
卸载软件包:
choco uninstall hugo
验证安装:
1. hugo version
创建 Hugo 网站
1. 创建 Hugo 网站
打开终端或命令行,执行以下命令:
1. # 导航到目标目录
2. cd D:/# 创建目标目录并进入
mkdir hugo
cd hugo# 在当前目录下创建 Hugo 站点 cyrus
hugo new site cyrus
2. 添加主题
官方主题网站:https://themes.gohugo.io/
你可以选择一个喜欢的主题并添加到你的 Hugo 网站。例如:
1. git init
2. git submodule add https://github.com/theNewDynamic/gohugo-theme-ananke.git themes/ananke
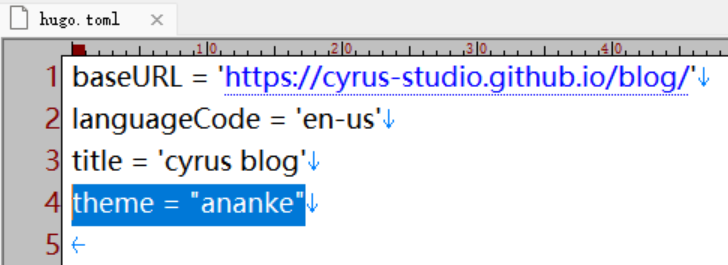
在 hugo.toml 文件中添加 theme = “ananke”,表示使用 themes 下的 ananke 主题
由于 ananke 主题使用 SCSS/SASS,Hugo标准版是不支持的。
Hugo 的扩展版包含了对 SCSS/SASS 等高级功能的支持,通过以下命令升级到扩展版
choco upgrade hugo-extended -confirm
3. 创建内容
生成一个新的博客文章:
1. hugo new posts/my-first-post.md
- 编辑 content/posts/my-first-post.md 文件,添加你的文章内容。
4. 本地预览
运行以下命令来本地预览你的博客:
1. # 启动服务器
2. hugo server
3. # 或
4. # 启动本地开发服务器,包括草稿内容在内。
5. hugo server -D
- 打开浏览器访问 http://localhost:1313 查看你的博客。
5. 生成静态文件
hugo
生成的静态文件会放在 public 目录中。
部署到 GitHub Pages
1. 创建 GitHub 仓库
在 GitHub 上创建一个新的仓库,命名为 blog。
2. 配置 Hugo 部署
在你的 Hugo 项目中,创建 .github/workflows/hugo.yaml 文件,内容如下:
# Sample workflow for building and deploying a Hugo site to GitHub Pages
name: Deploy Hugo site to Pageson:# Runs on pushes targeting the default branchpush:branches:- main# Allows you to run this workflow manually from the Actions tabworkflow_dispatch:# Sets permissions of the GITHUB_TOKEN to allow deployment to GitHub Pages
permissions:contents: readpages: writeid-token: write# Allow only one concurrent deployment, skipping runs queued between the run in-progress and latest queued.
# However, do NOT cancel in-progress runs as we want to allow these production deployments to complete.
concurrency:group: "pages"cancel-in-progress: false# Default to bash
defaults:run:shell: bashjobs:# Build jobbuild:runs-on: ubuntu-latestenv:HUGO_VERSION: 0.128.0steps:- name: Install Hugo CLIrun: |wget -O ${{ runner.temp }}/hugo.deb https://github.com/gohugoio/hugo/releases/download/v${HUGO_VERSION}/hugo_extended_${HUGO_VERSION}_linux-amd64.deb \&& sudo dpkg -i ${{ runner.temp }}/hugo.deb          - name: Install Dart Sassrun: sudo snap install dart-sass- name: Checkoutuses: actions/checkout@v4with:submodules: recursivefetch-depth: 0- name: Setup Pagesid: pagesuses: actions/configure-pages@v5- name: Install Node.js dependenciesrun: "[[ -f package-lock.json || -f npm-shrinkwrap.json ]] && npm ci || true"- name: Build with Hugoenv:HUGO_CACHEDIR: ${{ runner.temp }}/hugo_cacheHUGO_ENVIRONMENT: productionTZ: America/Los_Angelesrun: |hugo \--gc \--minify \--baseURL "${{ steps.pages.outputs.base_url }}/"          - name: Upload artifactuses: actions/upload-pages-artifact@v3with:path: ./public# Deployment jobdeploy:environment:name: github-pagesurl: ${{ steps.deployment.outputs.page_url }}runs-on: ubuntu-latestneeds: buildsteps:- name: Deploy to GitHub Pagesid: deploymentuses: actions/deploy-pages@v4
Host on GitHub Pages:https://gohugo.io/hosting-and-deployment/hosting-on-github/
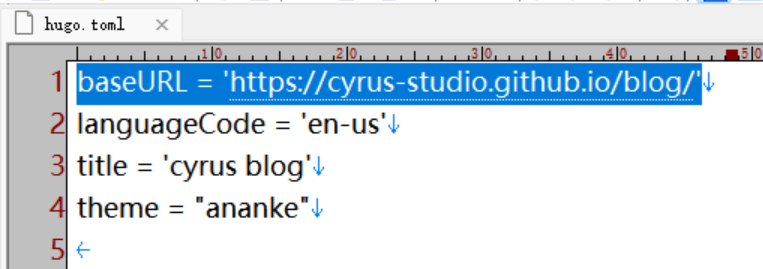
修改 baseURL = ‘https://your-username.github.io/blog/’
3. 提交代码并推送到 GitHub
初始化 git 仓库并将代码推送到 GitHub:
1. git add .
2. git commit -m "Initial commit"
3. git branch -M main
4. git remote add origin https://github.com/your-username/your-username.github.io.git
5. git push -u origin main
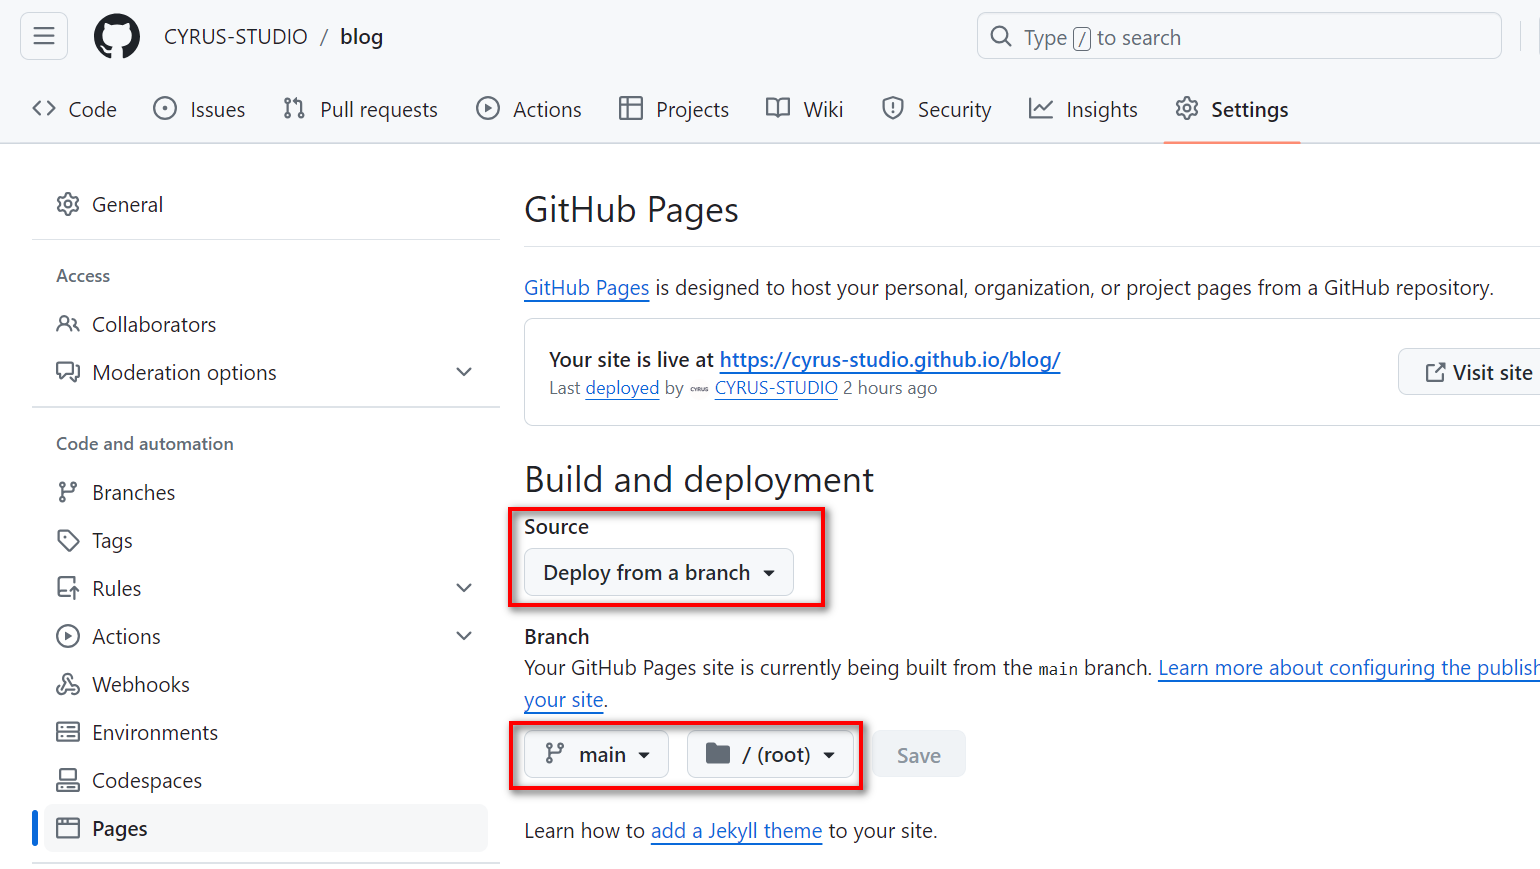
代码上传完成后,打开【Settings】【Pages】,修改【Source】和【Branch】如下:
4. 查看博客
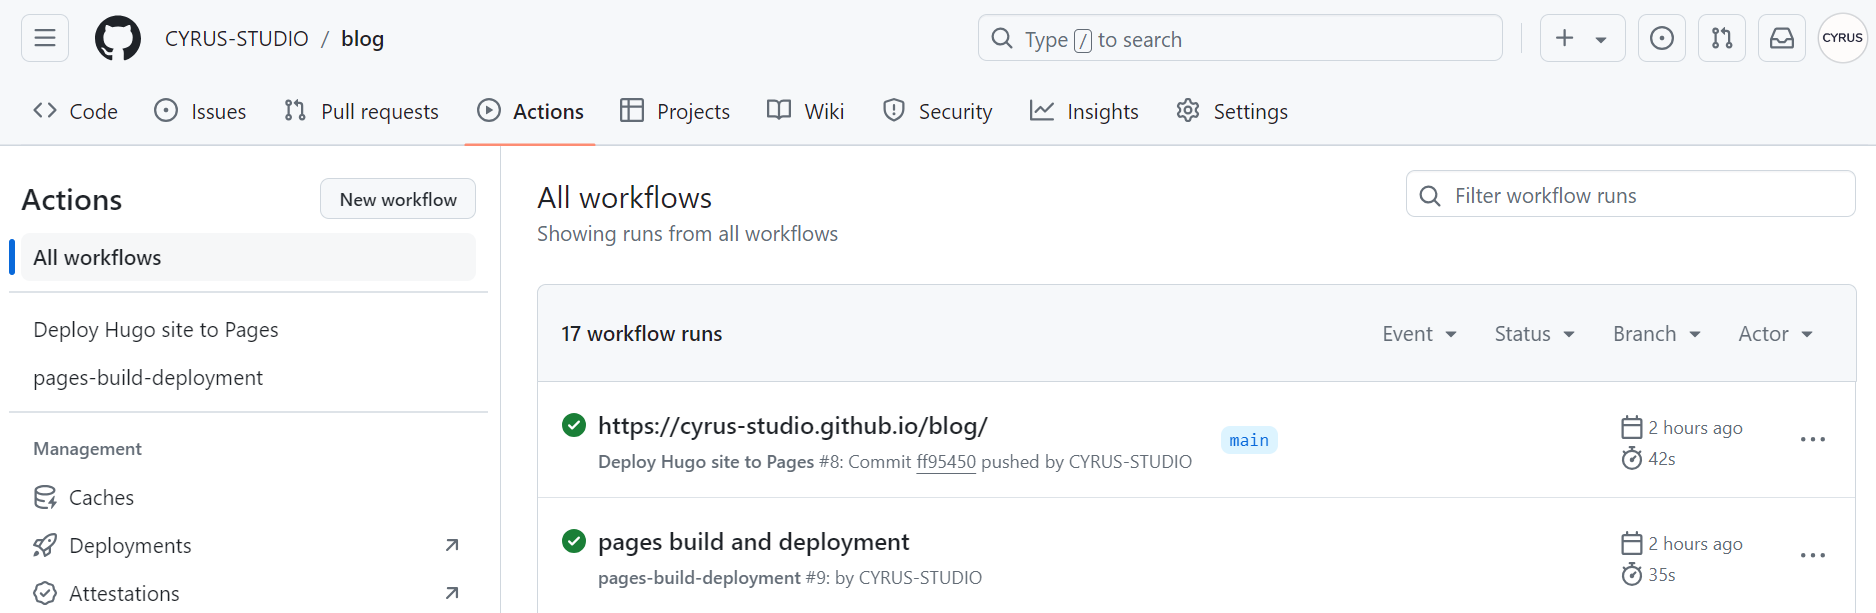
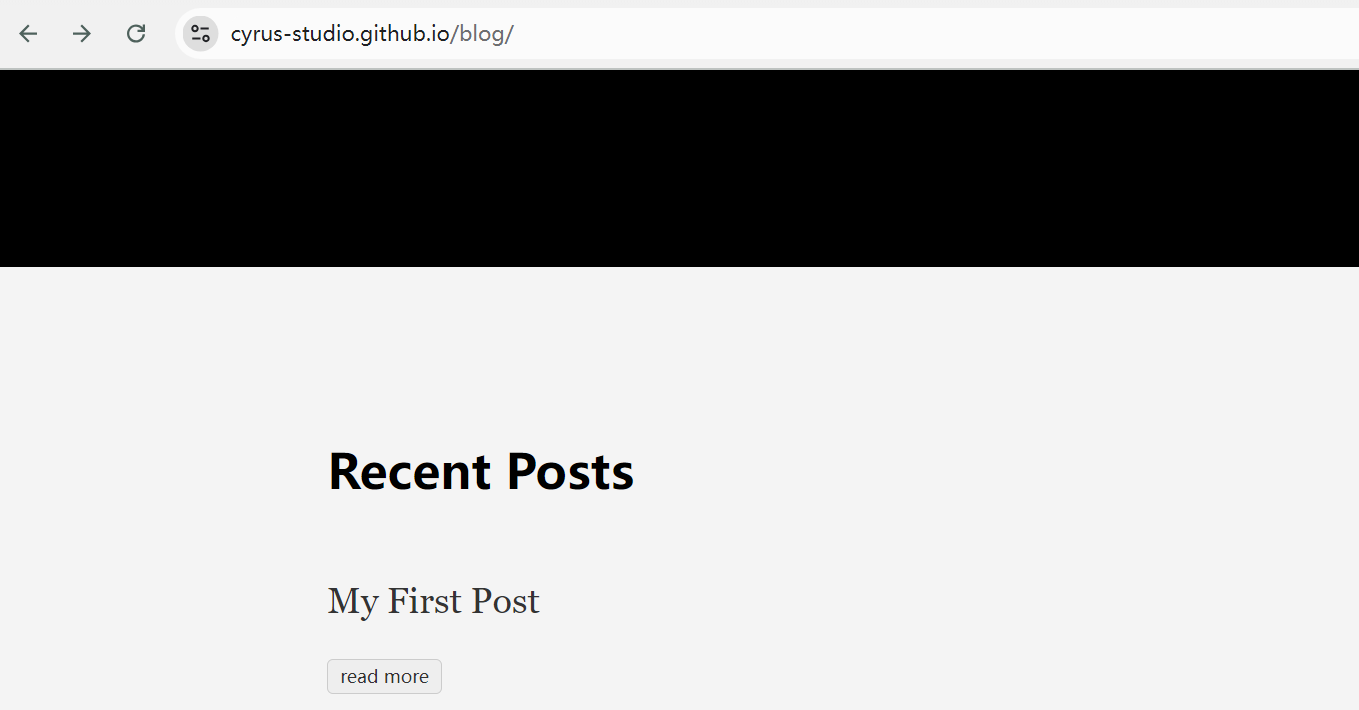
GitHub Actions 会自动构建并部署你的博客,等待workflow run完,你可以通过 https://your-username.github.io/blog 访问你的博客。
总结
通过以上步骤,你可以使用 Hugo 和 GitHub Pages 0成本地搭建一个博客。这个方法不需要购买域名和托管服务,使用的工具和平台都是免费的。你可以根据需要选择和定制主题,添加内容,并通过 GitHub Pages 免费托管和发布你的博客。